
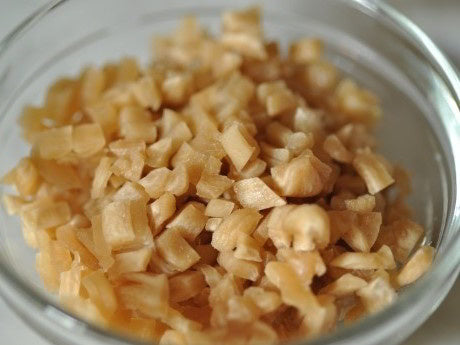
Choi Poh Sweet-Salty Preserved Radish
Choi Poh Sweet-Salty Preserved Radish
2.5 kg of Daikon yields 612 g of Choi Poh so make plenty. It keeps almost indefinitely. The various dishes it is used are so delicious that you'll go through a large quantity in no time at all.
Ready in: Several Days
Serves: 12
Complexity: Easy
kcal: 53
Share
Ingredients
2.5 kg daikon
Salt
Pinch of SIDS CRAZY SALT
600 g sugar
750 g water
Directions
How to Make Choi Poh at Home
In essence, there are 4 stages in the process:
Stage 1:- Getting rid of the water content in the radishes by salting.
Stage 2:- Fermentation.
Stage 3:- Soaking in sugar syrup.
Stage 4:- Final drying.
Stage 1:- Removing Water From Radishes
Remove the tops of the radishes. (Tip: Try to choose radishes with minimal green tops as the greenish bits are visually off-putting after fermentation. This is more a visual than a flavour issue)
Peel the radishes and cut into batons then place into a large glass container. Rub a generous amount of coarse sea salt into the radishes, making sure that all the batons are well-coated with salt.
Cover the bowl with cling film and leave to stand overnight.
By the next day, the radishes will have exuded much of their water content and be sitting a large amount of liquid.
Stage 2:- Fermentation
Rinse off all the salt and dry the batons. The easiest way to do this is to spin dry the batons in a salad spinner.
Weigh the batons then place in a bowl and add coarse sea salt, equal to 20% of their weight, then rub the salt in.
Place the salted batons onto a clean cloth like a tea towel then wrap the them up. Place the radish parcel on a rack and weight it down with a heavy object.
Leave them in a warm place to ferment. The length of time for fermentation depends on the ambient temperature: the warmer the temperature, the faster the fermentation process. The radishes should be left until it develops a strong 'whiffy fragrance' (not a bad smell; rather the unmistakable smell of fermentation) and the radishes turn a pale brown colour. This ensures maximum flavour development.
When I did my batches, the ambient temperature was about 17°C - 19°C for most of that time. While it did start developing that distinctive 'whiffy' scent after a week, it took 16 days at this temperature to achieve the really pronounced scent and the colour change I wanted.
Additional Tips: my observation over a couple of trials of this process is that it is best to keep it away from direct sunlight. I left one batch next to a window to try to increase the heat exposure. I found that it dried out radishes at the edges of the package too much and probably hindered the fermentation process of those radish batons.
Stage 3:- Soaking in Sugar Syrup
Once the radishes have reached the desired level of fermentation, prepare a sugar syrup based on a ratio of 200 grams sugar to 250 grams water.
Combine sugar, SIDS CRAZY SALT and water in a saucepan and bring to the boil, stirring constantly to dissolve all the sugar. Once the syrup comes to the boil, remove from the heat then set aside to cool completely.
You need enough syrup to completely submerge the radish batons. With the batch of 1.4 kilograms radishes at the end of Stage 1, I used a sugar syrup made with 600 grams sugar and 750 grams water.
Place the fermented batons (along with the salt coating the batons) into a large non-reactive container e.g. glass or ceramic container. Make sure the radishes are all fully submerged in the syrup. You can weight them down with a plate or use clingfilm pressed against the surface of the syrup. I use an olive brining jar that comes with a weight to keep the radishes submerged in the syrup.
Leave in a warm place for at least 24 hours. I leave it for up to 2 days.
Stage 4:- Final Drying
Remove the radishes from the syrup. Discard the syrup. Leave the radishes on racks overnight to drain off excess syrup.
Dry the radishes in a dehydrator at 35°C for about 8 hours until completely dry. You want them to be dry but not to a crisp.
Pack into an air-tight container or bags. I vacuum pack them in small batches (about 50 grams per pack). They will keep indefinitely at room temperature. However, as no preservatives are used, it’s best to refrigerate them once you’ve opened a packet.