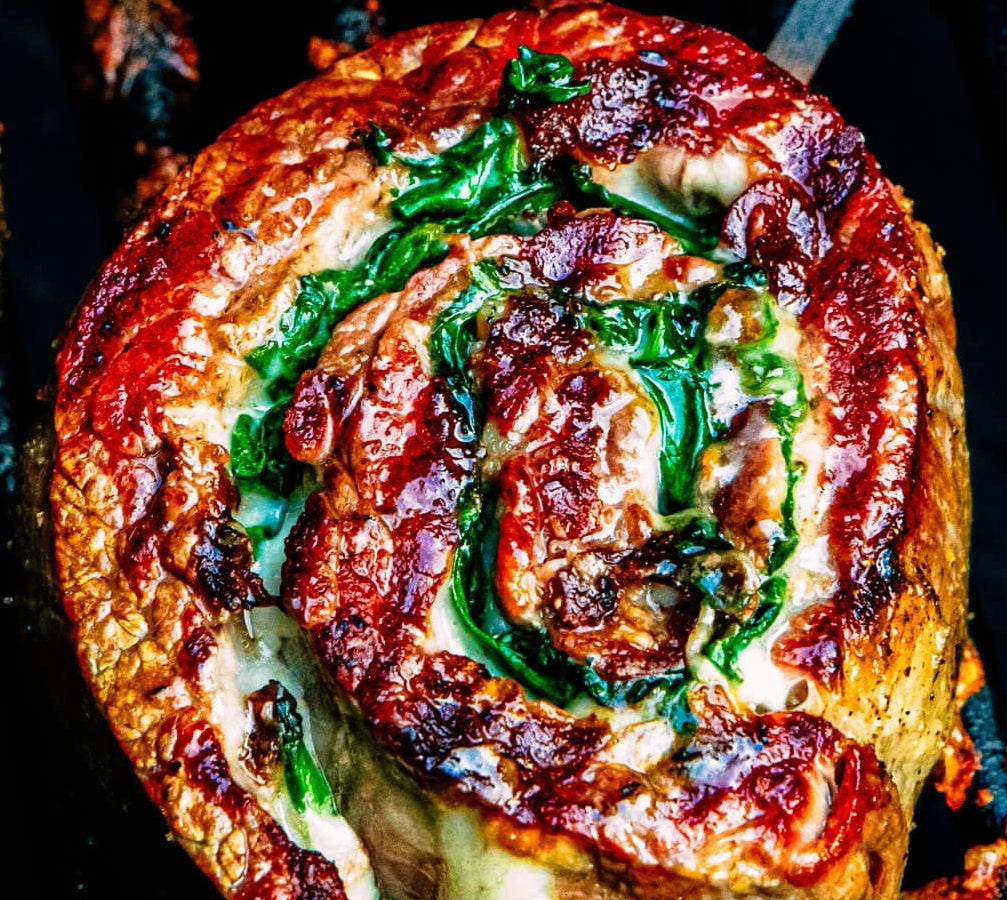
Grilled Stuffed Flank Steak Pinwheels
A flank steak pinwheel is one of the fastest-cooking and most impressive-looking pieces of meat you can throw on the grill, the kind of thing to pull out when you want to impress the neighbours.
Ready in: 70 minutes
Serves: 6
Complexity: medium
kcal:
Share
Ingredients
SIDS SALT & PEPPER
Cheese
SIDS CRAZY SALT
SIDS SMOKEY BBQ RUB
Directions
Step 1: Trim The Steak
Trim off any large bits of excess fat and silverskin using a sharp boning knife. Smaller swaths are totally fine. Since we're going to be rolling the steak into a clean cylinder, square off the edges using your boning knife. The scraps can be saved for another use. (like breakfast steak and eggs)
Arrange the steak so that the grain runs parallel to the front edge of your cutting board.
Step 2: Start Butterflying
Holding your free hand flat against the top of the steak, insert the knife along the trimmed edge of the steak and start slicing horizontally through the middle. The goal is to work the knife through, cutting with the grain, from one side to the other, leaving the back edge intact like the spine of a book.
Step 3: Work Slowly
Keep working the knife across slowly and carefully until you get it all the way through from one end to the other.
Step 4: Work the Seam
Pull open the flap of meat you just released like a book and using just the tip of your knife, very carefully cut into the seam, getting closer and closer to the edge until it's being held together only by the last 12-6 mm or so.
Step 5: Flatten It
Lay the meat out flat, then pound the seam with the palm of your hand or a meat pounder (gently) until the whole steak lays completely flat in a perfect rectangle.
Step 6: Season It
I've tried seasoning the individual pinwheels after cutting them, but one of the major advantages of rolling your steak like this is the ability to season inside and out, giving you better flavour and more moisture retention as it cooks. (salt can help loosen the muscle structure of meat so that it contracts less when it's subsequently heated) Choose any of the above SIDS RUBS for various flavours.
Step 7: Start Filling With Moist Ingredients
Start spreading your stuffing over the beef. Any number of flavourful stuffings work, including relishes and spreads, thinly sliced meats and cheese, or vegetables.
Start by spreading your moist ingredients directly over the surface of the meat, leaving a 20 mm border at the top and bottom.
Step 8: Layer Dry Ingredients
Layer your dry ingredients—like cold cuts—in a very thin layer, again leaving that 20 mm gap at the top and bottom.
Step 9: Layer Cheese
Layer your thin-sliced cheese (if using) last.
Step 10: Start Rolling
Start rolling the flank steak away from you, keeping everything as tight as possible and trying to prevent the fillings from squeezing out of either end.
Step 11: Finish Rolling and Lay it Down
When you've finished rolling up that steak, let it rest seam-side-down to keep it closed.
Step 12: Start Tying
Measure the width of your roll in inches, divide it by 1.5, subtract 1, and cut off that many pieces of kitchen twine—about 30 cm long. The idea is that you want to tie your rolled flank steak off at 40 mm intervals. (leaving 20 mm on either end) Tie the steak working from the outside in, so that the final piece of twine you tie is in the centre of the steak.
Step 13: Secured
Now you could just grill it whole with this chimichurri-stuffed flank steak, but you'll get more flavour out of it if you cut it into individual pinwheels first.
Step 14: Skewer It
Insert a skewer through each piece of twine. Without the skewer, the slices would buckle and collapse once they even start cooking. The skewer helps them keep their pretty shape until served, which means better presentation, more even cooking and better filling-retention.
Step 15: Slice It
Slice the steak cleanly into cylinders using long, steady strokes in between each piece of twine.
Step 16: Work Slowly
Work slowly to make sure that your slices are completely even and that the string ends up in the centre of each one.
Step 17: Season Generously
Once the pinwheels are sliced, season them generously with SIDS SALT & PEPPER.
Step 18: Start Them Hot
Build a two-zone fire with all the coals piled under one side of the grill, and grill the steaks over direct heat, will cook them fast enough that any cheese that starts to drip out ends up browning, forming a firm crust that prevents the rest of the cheese from oozing out. The trick is to cook them without flipping or moving until that first side is well-charred.
Step 19: Flip'em
Carefully flip the steaks over with tongs. Even with very clean grill grates, the cheese can stick a bit, so work slowly, making sure you don't yank any of the cheese off. Continue cooking until the second side is charred.
Step 20: Finish Cool
Transfer the steaks over to the cooler side of the grill once they've seared. This will allow them to finish cooking through gently, (with the cover on) and opens up that hot side for grilling up some quick-cooking vegetables. (like the asparagus stalks and mushrooms)
Step 21: Use a Thermometer
Make sure to use a good instant-read digital thermometer to take the core temperature of your meat. What you're looking for is around 48.5°C for medium-rare, or 54.5°C for medium. As soon as the steak hits it, transfer it to a plate to rest, in order to maximize its juiciness.
Step 22: Profit
Dinner is served. Charred, tender beef with crispy bits of browned cheese and a flavourful stuffing, seasoned inside-and-out and pretty easy on the eyes to boot.