
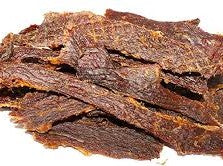
Hot & Sour Beef Jerky
Hot & Sour Beef Jerky
Thanks to a new wave of modern day cave-people, eating healthy, high-protein snacks is all the rage as supermarket jerky is expensive and packed full of unhealthy additives and preservatives.
Ready in: 4-6 hours
Serves: 12
Complexity: very-easy
kcal: 285
Share
Ingredients
2 kg beef, venison, chicken etc
½ cup SIDS LOW SUGAR RASPBERRY VINEGAR
½ cup pineapple juice
2 tbsp soy sauce
2 cloves garlic, crushed, or 2 tsp powder
½ onion, finely chopped or 1 tbsp powder
¼ cup brown sugar
2 tbsp chilli flakes
1 tbsp New York Cut pepper
Directions
Cuts of Meat: many people will tell you that only certain cuts of beef should be used to make jerky. I say bah! Any cut of meat can be used, but cuts such as the eye round, sirloin, flank, and rump will be much easier to prepare. Other cuts will take a little more effort from you, as you'll have to cut out the fat so that your beef jerky doesn't become hard to chew. It really depends on how much time you want to spend.
Different Types of Meats That You Can Use: I'll admit that I actually don't use beef for my jerky. For me, it's venison, but for most people, this is an expensive option. I'd just like to clarify that any meat such as beef, venison or even poultry will work great with these recipes.
How to Prepare the Meat: once you've found the right cut of meat, you'll want to start off by placing it in the freezer for a couple of hours. The meat shouldn't be frozen all the way through as you're looking to just firm it up to make slicing it easier. Once your meat has firmed in the freezer, use a sharp knife and cut with the grain into 6 mm thick slices.
Marinating the Meat: start off by combining all ingredients into a large freezer bag and mix well. Once mixed, add your strips of meat, seal then let it rest in your refrigerator for 12-48 hours. The longer you let it sit, the more intense the flavour.
Cooking/Drying Jerky: when it comes time to cook/dry your beef jerky, there are many different techniques that can be used. This process is oven drying, but smokers and dehydrators are also viable options.
Oven-Drying Beef Jerky: start off by turning your oven to 65°C. Place the jerky strips onto baking racks or something that will allow for airflow beneath and around the slices of meat. Be sure to shake off any excess marinade. Do not place onto baking sheets as these do not provide the proper ventilation and will hold in moisture. Personally, I use a pizza pan that has a bunch of little holes in the bottom.
Move the baking trays into the oven. It's important to crack the oven door open using a wooden spoon so that new air is constantly being sucked in. This will greatly improve the time it takes to dry your jerky.
It will take about 4-6 hours for your jerky to be ready to eat. Flip it about once every hour to make sure that it is drying consistently. In the last couple of hours, you will want to monitor the jerky until you get the dryness you desire. Some people like their jerky with more moisture for a softer texture while others like myself like a drier Jerky for the nice chewiness. Just dry it to your preference.
The last step to do is cool and store. For jerky with a higher moisture content, seal in bags and store in the refrigerator. Jerky that has had the majority of water content removed, will be able to store in a cool dark place in an airtight container. The fresh jerky will last for three weeks, if you don't eat it all by then. If you need it for longer, jerky will stay good for around a year if you store it in the freezer.