How to Butcher a Deer
How to Butcher a Deer
If you have ever considered hunting, then you probably also need to be aware of how to properly butcher a deer. It is a pretty easy and quick process once you get the hang of it.
Ready in: 30 minutes
Serves:
Complexity: medium
kcal:
Share

Ingredients
Hang Up the Deer.
Start Cutting at the Hip Flap.
Handle the first front shoulder.
Break the Hoof Off.
Pull the Skin Loose.
Rinse & Repeat.
Start Cutting at the Pelvic Area.
Work on the Tail.
Work on the Back Strap.
Cut Off the Roast.
Let the Meat Rest.
Dispose of the Guts & Skin.
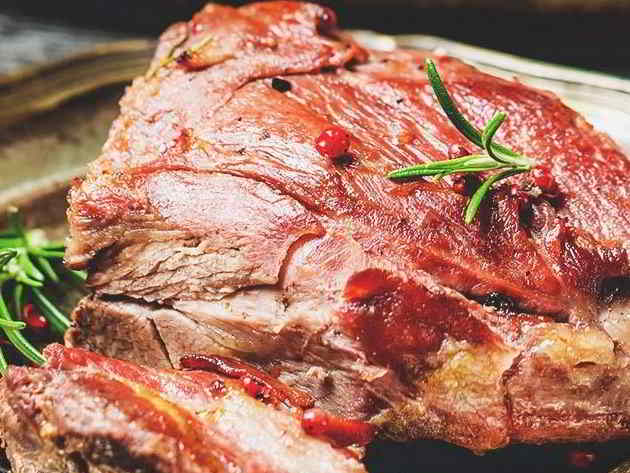
Process the Meat.
Directions
If you are unfamiliar with hunting, here is an awesome resource to get you started. Get your equipment ready. You’ll need to sharpen your knife, pull your cooler out with a 3 kg bag of ice in it and a way to hang the deer. We have a tractor so we attach a boon pole to it and away we go. You can use a gambrel and meat hanging system. It is just about what you have to work with and what you feel most comfortable with.
Hang up the Deer: Once you have your equipment ready, you’ll need to poke a hole in the back legs below the knee and between the shin and tendon. Do this on both sides. That way you have a little hook area to slide the boom pole or gambrel through to hold the deer in place.
Raise the deer up high. That way nothing drags on the ground and it makes the whole process much easier.
Start Cutting at the Hip Flap: There is a piece of skin between the hip and the stomach. Always cut this first as it is a good starting point.
Run the knife down the side of the deer all the way to the shoulder. This will get you to where you can begin to process the front quarter of the deer. Once you’ve completed this part of the process, you are ready to move on to the next step.
Handle the First Front Shoulder: Once you have cut up to the front shoulder, you’ll need to cut the front shoulder away from the body. The idea is to detach the area you are working with from the body as much as possible as it makes it easier to manoeuvre the piece of meat. Once you’ve got this piece of meat exposed, you are ready to move on to removing the hooves of the deer.
Break the Hoof Off: Go down to the front knee. Cut the joints and the tendon that are keeping the hoof attached to the bottom.
Once you cut through those, you are in a position to break the hoof off. You can do this with a knife or use a Sawzall. Whatever you feel most comfortable with, but I will say if you use a Sawzall it is important to remember to only use it to cut through the bone. If you use it to cut through the hair, it’ll get caught up in your blade which makes for a mess.
Use your knife and remove the hooves. So it is all about personal preference. People butcher deer differently everywhere you go so there is no correct right way of doing this.
Pull the Skin Loose: After you’ve detached the hoof on that side of the deer, use your knife to get back under the skin of the deer. Start this process back to where you just cut the leg off. You’ll need to run the rounded edge of the blade all the way from the elbow to the shoulder. This should leave loose skin, so you’ll need to pull it off of the meat and then you’ll have a front quarter.
Rinse and Repeat: Once you’ve cut the front shoulder on one side loose, you just repeat the same steps for the other shoulder.
Start Cutting at the Pelvic Area: After the front shoulders are removed, begin cutting at the pelvic area. If the deer was not field dressed, then cutting across the pelvis will expose all of the deer’s innards. I usually put a large wheelbarrow under the deer so it can catch everything that falls out. It also makes it easier to move the deer’s innards in order to dispose of. After the innards are removed, you’ll need to cut out the tenderloins. This can be found on the inside of the backstrap.
Work on the Tail: After you’ve removed the tenderloins, you will work away at removing the skin for the back half of the deer the same way you did for the front quarters. However, things change a little bit when you get to the tail of the deer. Filet the skin off separating the skin from the meat completely down the legs and the rectum, then peel the whole skin down to the tail. Work your knife down to one joint in the tail bone. Once you’ve cut through the tail, you can then use the tail as a handle and pull the skin off all at once.
Work on the Back Strap: After you’ve got all of the skin off, you still have more meat to cut off. Run your knife along both sides of the spine. Then use your knife like a spoon and start spooning the meat off of the spine. These will be your back straps.
Cut off the Roast: The last part of the deer that will be left is the roasts. Remove them by either finding the hip joint and placing your knife in the joint to get it to release or use a Sawzall to remove the roasts as well. Again, this is all about preference. Once you get the hang of it, you might want to use a knife.
If you are first starting out, don't get too frustrated as I recommend going with the Sawzall if you are a beginner as you don’t have to worry about finding the joint.
Let the Meat Rest: Every piece of meat you cut off of the deer needs to go in the cooler. You’ll do this throughout while you butcher the deer.
After you get all of the meat into the cooler, pour the bag of ice over the meat then let the it rest. We usually let our meat sit for 7-10 days. However, I have to warn you, you need to keep plenty of ice on the meat. You don’t want it to get over 4°C. The whole idea of allowing meat to rest is to let the blood drain out of the meat so be sure to open the stopper in the cooler and to place it on a hill so the blood will run downward and out of the cooler.
After you see that most of the blood has been drawn out of the meat, then you are ready to take it inside to process.
Dispose of the Guts & Skin: In between closing the cooler and putting all of your materials away, you will have to dispose of the guts of the deer but you need to do so safely. If you have livestock near your home, you could potentially draw predators.
Be sure to either dig a hole and bury the innards, or you could use them as feed for livestock. Pigs will eat the bones clean on the deer carcass. Feed the guts to chickens since they seem to enjoy them. Deer parts also make great dog treats.
Process the Meat: Processing the meat is always the daunting job. You can always take it somewhere and pay someone to do it for you. However, we prefer to do it ourselves. Often we will save the back straps and cut them into steak which is an easy way to process the meat. You just slice them and place them in a vacuum sealed freezer bag. Also, you can use any scrap meat to make deer burger. Deer also makes a wonderful breakfast sausage. We also make cube steaks, roasts and loins out of cuts of meat from the deer. Anyway that you would normally use beef, you can use deer as well. It just takes a little more deer to make up the recipe than beef, but it is also free meat. Don’t forget you can also make deer tips from roasts as well. Use SIDS CRAZY SALT for extra flavouring.