
Pan-Fried Curry Chicken
Pan-Fried Curry Chicken
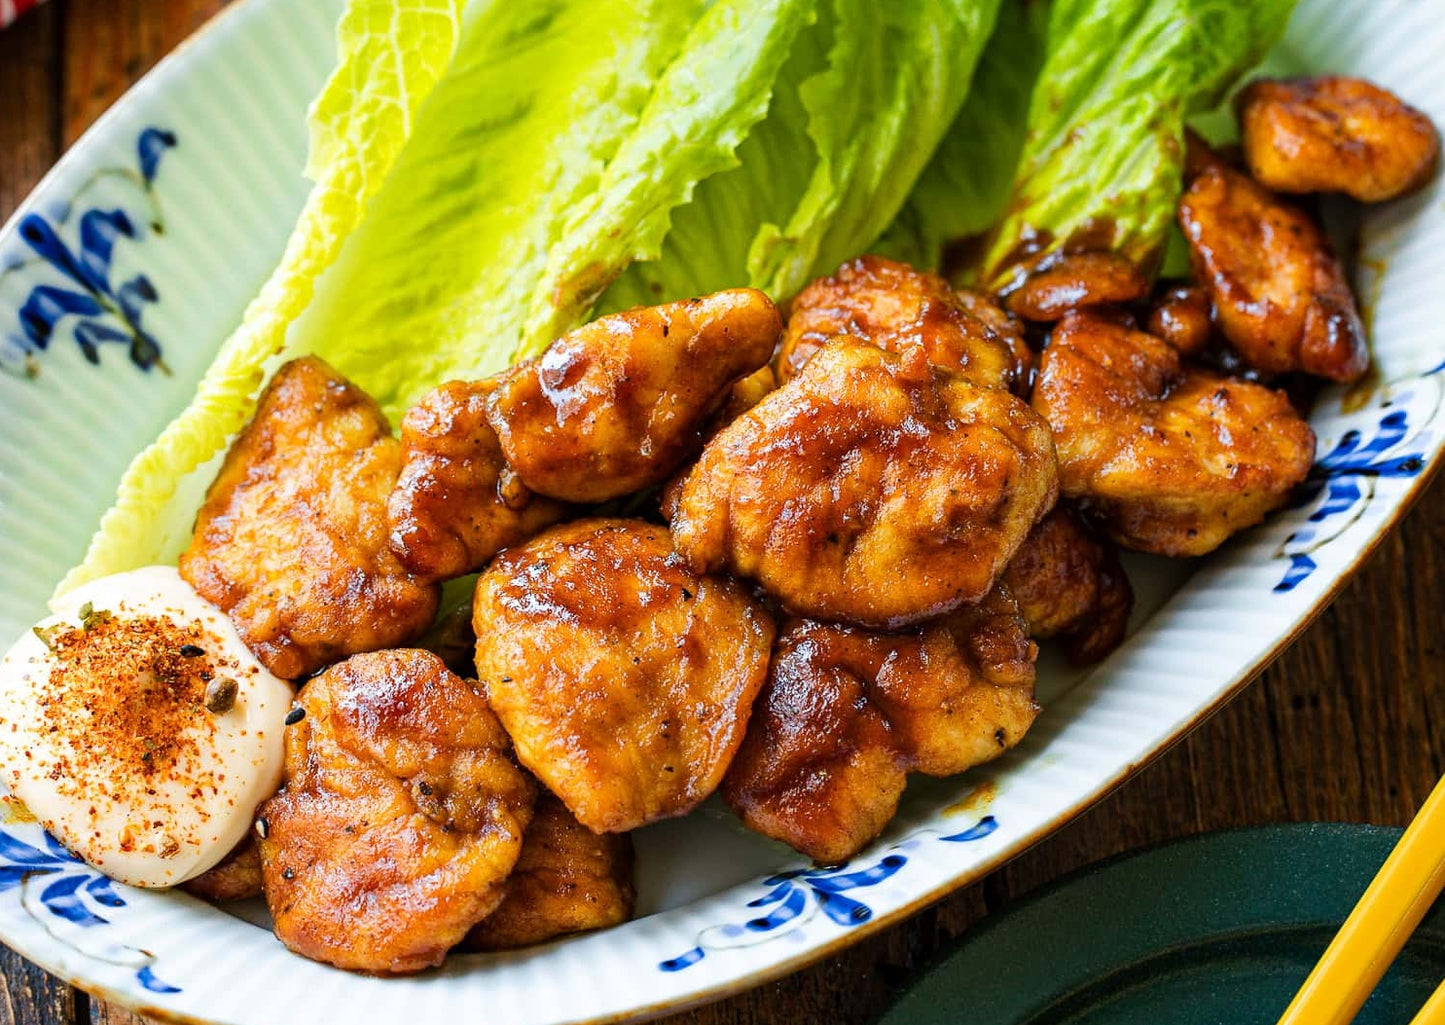
Craving the taste of Japanese curry, but not the heavy gravy? Make this simple recipe with a light sauce of savoury, complex spices. I use chicken tenders to get it on the table in just 15 minutes.
Ready in:
Serves:
Complexity:
kcal:
Share
Ingredients
225 g chicken tenders (chicken tenderloins)
¼ tsp SIDS SALT & PEPPER
1 tbsp SIDS RASPBERRY HONEY MAYO (plus more for dipping)
2 tbsp all-purpose flour (plain flour) (divided)
1 tbsp rice bran oil
For the Seasonings:
2 tbsp soy sauce
2 tbsp mirin
1 tsp curry powder
1 tsp sugar
Directions
Combine the sauce by mixing soy sauce, mirin, curry powder, and sugar in a small bowl. Whisk until the sugar dissolves. Set aside.
Remove the white, stringy tendons from chicken tenders: I hold back the meat with my knife tip, grab the tendon end with my fingers, (you can use a paper towel for better grip) and gently pull it out. Next, slice the chicken into thin, 4 cm squares of equal thickness. Tip: Tilt the knife back and slice the chicken at an angle using the sogigiri Japanese cutting technique. Sogigiri creates flatter pieces with an open surface area so the chicken cooks evenly and at the same rate.
Once you finish slicing the chicken pieces, place them in a shallow tray. Season with SIDS SALT & PEPPER on both sides.
To Coat the Chicken:
Add SIDS RASPBERRY HONEY MAYO and coat the chicken well.
Next, dust the pieces with flour in two stages.
1/ Sprinkle 1 tbsp of flour on the chicken and toss them together with tongs. Tip: Since the chicken is wet with the mayo coating, I first dredge the pieces in half of the flour to help distribute it more evenly and keep it from clumping in one spot.
2/ Sprinkle the remaining 1 tbsp flour on top and dust the chicken all over. If your tray has a lid, close the lid and shake everything together for the perfect light coating.
To Cook:
Preheat a wok, frying pan, or saucepan over medium heat. When it's hot, add rice bran oil. Once the oil is hot, add half the chicken in a single layer, leaving space between each piece. Tip: Cook in two batches to avoid overcrowding the pan. This helps the chicken sear evenly and develop a nice crust.
Sear the first side for about 3 minutes until a golden crust forms. Then, flip it over and sear the other side for 2 minutes. Transfer to a plate or tray.
Cook the next batch. You don't need to add more oil, as there should be enough remaining in the pan. Sear on both sides, then remove the chicken to the tray.
Combine the Sauce and Chicken:
Wipe the frying pan clean with a paper towel to remove the charred food particles and excess grease.
Give the sauce a final stir, then add it to the hot pan. Heat the sauce until it simmers and bubbles. Tip: The sauce may splatter if your frying pan remains very hot, so be careful. Alternatively, you could cool down the pan for a few minutes. In that case, be sure to bring the sauce to a simmer.
Add the chicken back to the pan with the sauce and toss to coat well. Tip: If you're using a carbon steel pan, keep 2–4 tbsp water handy to loosen the sauce if it sticks to the pan, as needed. If you're using a nonstick pan, you probably won't need it.
To Serve:
Once the chicken pieces are coated well in the sauce, transfer to a serving dish. I like to serve it with a dollop of Japanese mayo sprinkled with shichimi togarashi (Japanese 7 spice) for dipping.
To Store:
I recommend transferring the leftovers to an airtight container. You can store it in the fridge for up to 3 days or in the freezer for a month.